Monday, 21 March 2016

New knives and new designs WIP ( 1/?)

Hi all,

Spring is in the air and I'm making the most of what time I can get in the shop! These will be my first offerings through my site and are designs that I've been wanting to do for quite some time. Not too much different from other knife WIP's that I've posted , with the exception being that these were all done with my new grinder and I've been experimenting with some different grinds. The designs that I chose to make this time around were a puukko , Canadian belt  knife, and a different take on the city knives I've worked on in the past ( doesn't need too much explanation).

The puukko is a very utilitarian design from Scandinavia that uses a zero edge bevel, which essentially means that there is no secondary bevel resulting in a very keen edge well suited for wood carving tasks and easy sharpening. The only tradeoff is that the edge is more fragile than other grinds with a secondary bevel or convex grind, and has reduced slicing ability in tasks such as food preparation.

The Canadian belt knife is a relatively recent design created by Rudolph Grohmann for D.H. Russell Knives originally based in Toronto in the 1950's and one of the few designs that originated in Canada. I was attracted to this design due to it's unique look designed for ergonomics. Its offset handle allows for a positive grip that prevents slippage forward and a substantial belly for hunting tasks. My take on this design has a much beefier handle than those currently produced by Grohmann knives to allow to fill the hand better and to make it proportional to the larger blade (5") to allow for some heavier uses such as light wood prep.

I'll let the pictures do the talking, but this batch has been quite fun in taking advantage of the capabilities of a proper 2x72 grinder - and I hope to get more batches done in the future!

Laying out profiles on 1/8" O1 barstock

Rough profiling with a hacksaw ( and drill press in tight areas) 

Center punching drilling locations


 Cleaning up profiles using an 80 grit belt.

Temporary angle guide for scandi edges - this one is made of pine but I'll be making a more permanent one in the future - probably out of aluminum or steel.


First scandi grind - success! 

Family photo after initial grinds. From left to right - puukko, Canadian belt knife, and gentleman's knife. The Canadian belt knives have not been finished grinding as I planned to make them convex for optimal strength and cutting performance.


Canadian belt knives after slack belt grinding to blend the half height grind and hand finishing . I used sand paper on a foam rubber backing to blend any remaining flats . Unfortunately I forgot to take pictures of this process as I only have two hands- but it was quite an interesting learning experience. I'll be doing more experimentation with convex grinds but I can definitely see myself doing more of them for heavier use knives.

The next steps will be heat treatment and building the handles, then making the sheathes.  I'm still in the process of deciding which materials to use, but will likely be using a combination of micarta and durable hardwoods like osage or African blackwood, we'll find out later.

Stay tuned for more!


Wednesday, 30 December 2015

Christmas Break Project: Hultafors Axe Sheath

As promised - part two of my Christmas project!

This would be my first attempt at a sheath for an axe still in production - so hopefully it will allow me to work on future projects with this model.

The process I used was similar to the axes that I have done in the past. The leather used is 7-8oz vegetable tanned leather, saddle stitched, and reinforced with double capped rivets at high stress points on the corners of the welt.  The only difference between this sheath and the ones the previously is that I used line 20 size rivets as opposed to 24 for the horizontal flap to be in line with the size of the sheath.

Transferring my CAD template to leather


Adding my makers mark


All dyed and ready to punch and glue.

Saddle stitching


And now for the finished product: 


Hopefully Chris the sheath is to your liking, it will be making its way back to you soon!

On a side note I have also made a pair of stainless steel firesteels that will be available on my website - a bit of an experiment between a larger handle and very compact handle.  Get em while they're hot!


Saturday, 26 December 2015

Christmas Break Project: Hultafors leather handle guard

Happy holidays everyone!

Just thought I'd document some work that I'm doing for a customer I've been in contact with over the holiday break. The request was to make a leather sheath and leather handle guard for a Hultafors classic axe. I've made a number of axe sheaths in the past, but a leather handle guard would be a first for me and a fun challenge. 

There are a number of different ways a leather guard can be attached, using either paracord and eyelets to fasten it temporarily or with skein to permanently attach it to the handle, and a number of stitching methods such as cross stitch and whip stitch. I opted to go the permanent route and chose to use a baseball stitch to minimize the amount of exposed thread for durability. 

Normally when leather working I would attempt to make a template to minimize the amount of leather wasted  , but in this case it was more trouble than it was worth to try to wrap a piece of paper around the handle to get an idea of how much leather was needed. I dyed the leather with gel antique and clamped the leather down around the handle in a vise to get an idea of how much excess there would be, followed by alot checking and trimming to get the final shape.  

The final form was then dipped in wax to give it rigidity and waterproofing, then punched out for lacing with artificial sinew. One important learned while working with artificial sinew on oddly shaped pieces - get appropriately shaped needles and ones with an appropriate sized eye or you're going to need to buy more needles haha. 

The process of executing a baseball stitch is well documented in tutorials for upholstery - but below are a few pics of how I went about it. Nothing too fancy, it's like doing two whip stitches that cross one another - just make sure you tighten everything up as you go along. 


Something I probably should have documented was how to finish the stitch, but I'll the best I can to explain it and that it shows in the final picture. After reaching the last holes, double back to the second last holes, then tighten up the final loops at the end of your piece and tie the two threads together ( I used the beginning of a snake knot) as close as you can to the leather. Use a curved needle to pull the loose ends under your existing stitches to pull both the knot and the loose ends underneath ( about 4-5 stitches should be good), then carefully trim the excess. The result should be a clean final stitch where the loose ends are essentially invisible, and more importantly - protected from fraying or loosening. 

At the end of the day, the final product should be snugly to the handle with the stitches and if tightened sufficiently, slightly sunken into the leather. For extra measure I added a coating of my home made leather finish covered in my other posts, and gave the stitches a pass with a lighter to remove any frays or stray strands. All in all I think this was a successful attempt, although personally I think the stitching can be more even with practice. All that said , I'm confident that it'll serve the customer well and give the axe a classy appearance to match with the leather sheath that I will be covering shortly. Stay tuned! 


Monday, 26 October 2015

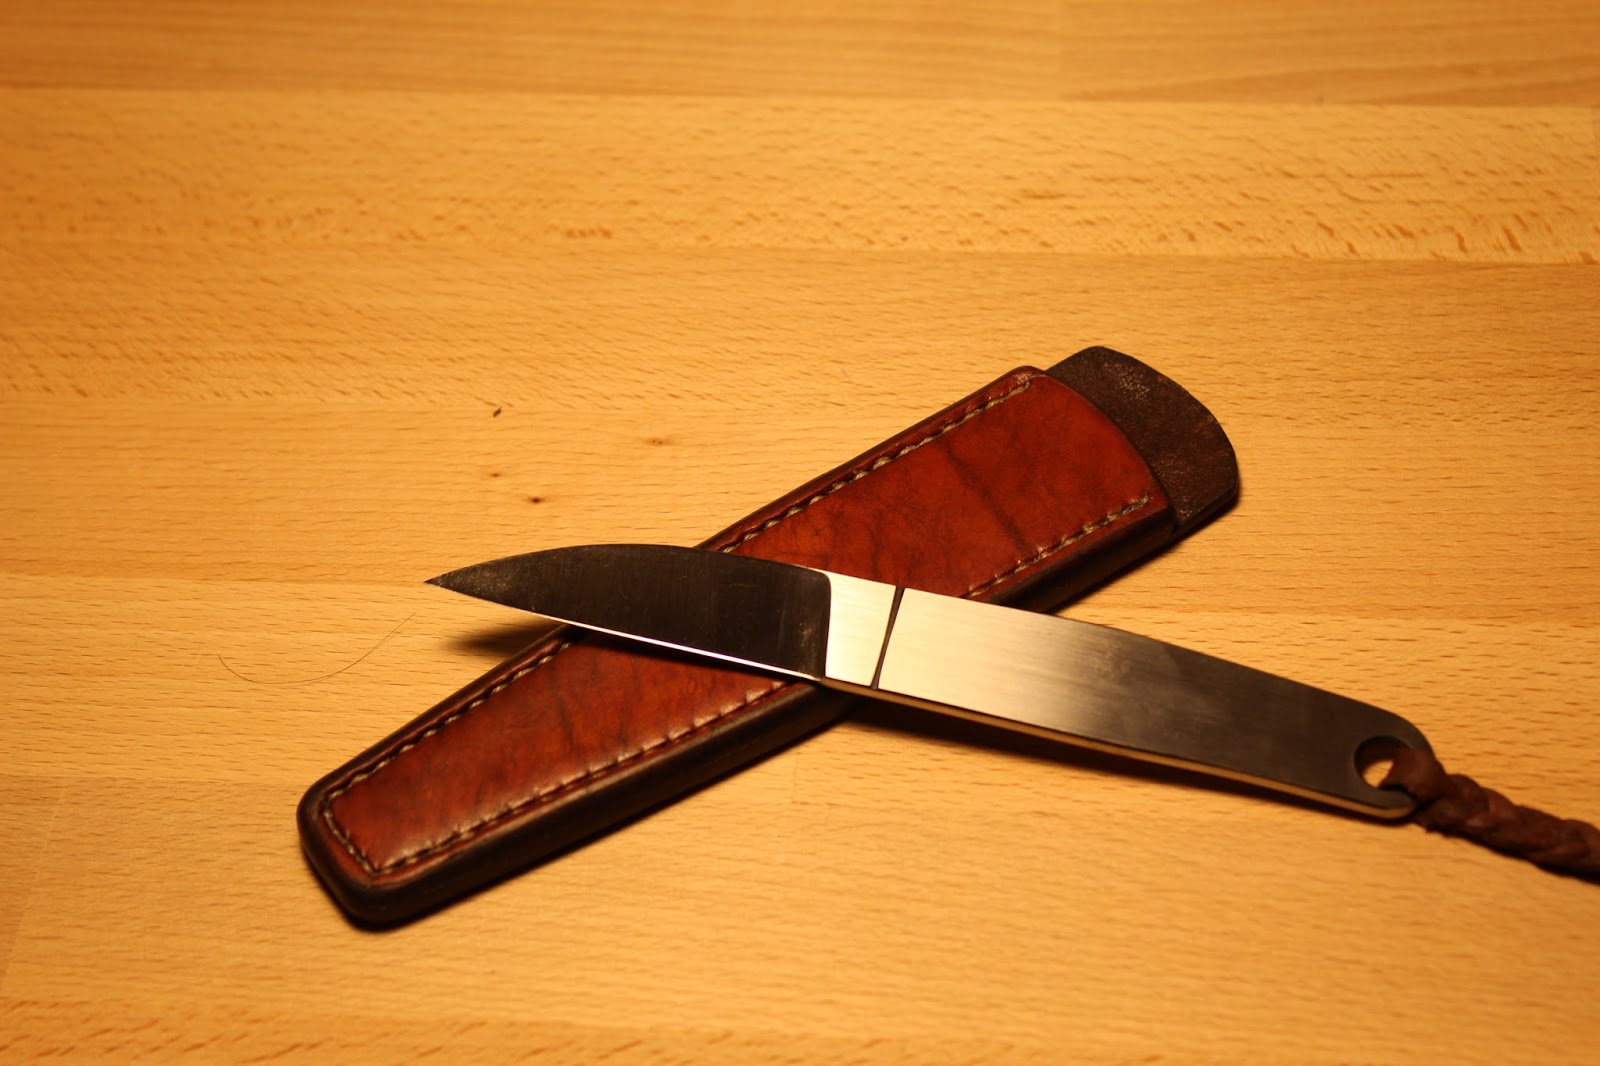
Short Thanksgiving Weekend Project (2/2): Minimalist city knife attempt #2

Just a short post on the sheath making process and some pics of the finished product. The sheath like the previous iteration is made from vegetable tanned leather, and was also made to accommodate the blade in more than one orientation to avoid accidental sheath damage.  I also attempted to make the welt for the knife somewhat thinner than the other city knife, since the overbuilt welt made the sheath somewhat bulky for the size of the knife. Since the welt was thinner however, I felt that it wouldn't hold up to use as long, I applied some full concentration acrylic resolene to try to toughen up the inner surface.  Thus far that treatment held up well for the axe sheath I made a few months ago, so hopefully it'll be more than enough for a simple light duty knife!

Punching the holes with a stitching chisel to set spacing for drilling with the drill press. 

Adding my makers mark to the back of the sheath. 

All the  components drilled and prepared for gluing and stitching! 
The welt was left oversize to minimize was from final edge finishing and getting all the layers flush with one another - easier to cut away than to add!

Saddle stitching - 1 out of 135 to go 

All stitched up and ready for final surface finishing - I applied both paraffin/ beeswax along with the neatsfoot oil/ resin/ wax mixture from my previous post on axe refurbishing. The saddle tan gel antique dye in the leather seems  to darken significantly after all the finishing and should be taken into account if you want something lighter! 

Burnished edge - the edges of the sheath were lightly chamfered using an edge beveller, after which chocolate brown leather dye was applied and run over with my home made dogwood burnishing tool. Nothing too special with the process there - wax it lightly or just dampen with water and rub it back and forth until it's the desired shape and the layers are well blended, then seal with the wax finishes. 

And now the glamour shots:


(probably the thinnest edge that I've put on a knife, no idea how thick it is but the width of the secondary bevel is barely visible) 


All in all I think this project was a success - and it'll serve many years peeling apples and opening letters. Overall, the slight changes to both the knife itself and the sheath are significant improvements over my last city knife in terms of both ergonomics and overall appearance, and I look forward to making more of these , maybe out of AEBL if time permits for a batch of them - hopefully not too far away in the future!  

Monday, 12 October 2015

Short Thanksgiving Weekend Project (1/2): Minimalist city knife attempt #2

Hope everyone has had a wonderful Thanksgiving!

It was a much needed break having just started a new job and moving over to another city, but I think I've just about settled in!  Unfortunately it also means that I've had much less access to my shop at my parents's place, so projects will be much more sporadic from here on out for the next while. 

This time around I tried my hand at making another city knife, but this time slightly larger and beefier so that it would fit the hand more comfortably, and I thought it would be a good way to test out the TDM from my last post. I didn't have a chance to take many pictures due to the fact that I left my good cameras back home and only had my phone, but thankfully those turned out pretty well. After looking at where I could improve on previous iteration I chose to do some. I used a hacksaw to cut the groove on the flats using a 123 block as a guide, then going in with a needle file to polish and round out the channel with sand paper for a much cleaner look. In terms of heat treatment, I also gave it a triple temper, which noticeably increased the toughness relative to my previous run. As well, I decided to get rid of the heat treat scale to give it a much cleaner look that would accept a patina over time that I think will give it alot of character.

I will get to working on the sheath when I am able get access to my shop again ( or can bring in some of my tools to the apartment). Until then enjoy the pics!

Laying out the template from CAD on a piece of 1" O1 tool steel. 

Ready for heat treatment! I'm really liking how close I can get the grinds with the new grinder without burning the steel or having to do a ton of hand sanding to fine tune the shape.

Post heat-treatment
All polished up and ready for a sheath.  Perhaps copper plating might be a nice touch in the channels - I'll have to think about that one!