Showing posts with label edc. Show all posts

Monday, 26 October 2015

Short Thanksgiving Weekend Project (2/2): Minimalist city knife attempt #2

Just a short post on the sheath making process and some pics of the finished product. The sheath like the previous iteration is made from vegetable tanned leather, and was also made to accommodate the blade in more than one orientation to avoid accidental sheath damage.  I also attempted to make the welt for the knife somewhat thinner than the other city knife, since the overbuilt welt made the sheath somewhat bulky for the size of the knife. Since the welt was thinner however, I felt that it wouldn't hold up to use as long, I applied some full concentration acrylic resolene to try to toughen up the inner surface.  Thus far that treatment held up well for the axe sheath I made a few months ago, so hopefully it'll be more than enough for a simple light duty knife!

Punching the holes with a stitching chisel to set spacing for drilling with the drill press. 

Adding my makers mark to the back of the sheath. 

All the  components drilled and prepared for gluing and stitching! 
The welt was left oversize to minimize was from final edge finishing and getting all the layers flush with one another - easier to cut away than to add!

Saddle stitching - 1 out of 135 to go 

All stitched up and ready for final surface finishing - I applied both paraffin/ beeswax along with the neatsfoot oil/ resin/ wax mixture from my previous post on axe refurbishing. The saddle tan gel antique dye in the leather seems  to darken significantly after all the finishing and should be taken into account if you want something lighter! 

Burnished edge - the edges of the sheath were lightly chamfered using an edge beveller, after which chocolate brown leather dye was applied and run over with my home made dogwood burnishing tool. Nothing too special with the process there - wax it lightly or just dampen with water and rub it back and forth until it's the desired shape and the layers are well blended, then seal with the wax finishes. 

And now the glamour shots:


(probably the thinnest edge that I've put on a knife, no idea how thick it is but the width of the secondary bevel is barely visible) 


All in all I think this project was a success - and it'll serve many years peeling apples and opening letters. Overall, the slight changes to both the knife itself and the sheath are significant improvements over my last city knife in terms of both ergonomics and overall appearance, and I look forward to making more of these , maybe out of AEBL if time permits for a batch of them - hopefully not too far away in the future!  

Monday, 12 October 2015

Short Thanksgiving Weekend Project (1/2): Minimalist city knife attempt #2

Hope everyone has had a wonderful Thanksgiving!

It was a much needed break having just started a new job and moving over to another city, but I think I've just about settled in!  Unfortunately it also means that I've had much less access to my shop at my parents's place, so projects will be much more sporadic from here on out for the next while. 

This time around I tried my hand at making another city knife, but this time slightly larger and beefier so that it would fit the hand more comfortably, and I thought it would be a good way to test out the TDM from my last post. I didn't have a chance to take many pictures due to the fact that I left my good cameras back home and only had my phone, but thankfully those turned out pretty well. After looking at where I could improve on previous iteration I chose to do some. I used a hacksaw to cut the groove on the flats using a 123 block as a guide, then going in with a needle file to polish and round out the channel with sand paper for a much cleaner look. In terms of heat treatment, I also gave it a triple temper, which noticeably increased the toughness relative to my previous run. As well, I decided to get rid of the heat treat scale to give it a much cleaner look that would accept a patina over time that I think will give it alot of character.

I will get to working on the sheath when I am able get access to my shop again ( or can bring in some of my tools to the apartment). Until then enjoy the pics!

Laying out the template from CAD on a piece of 1" O1 tool steel. 

Ready for heat treatment! I'm really liking how close I can get the grinds with the new grinder without burning the steel or having to do a ton of hand sanding to fine tune the shape.

Post heat-treatment
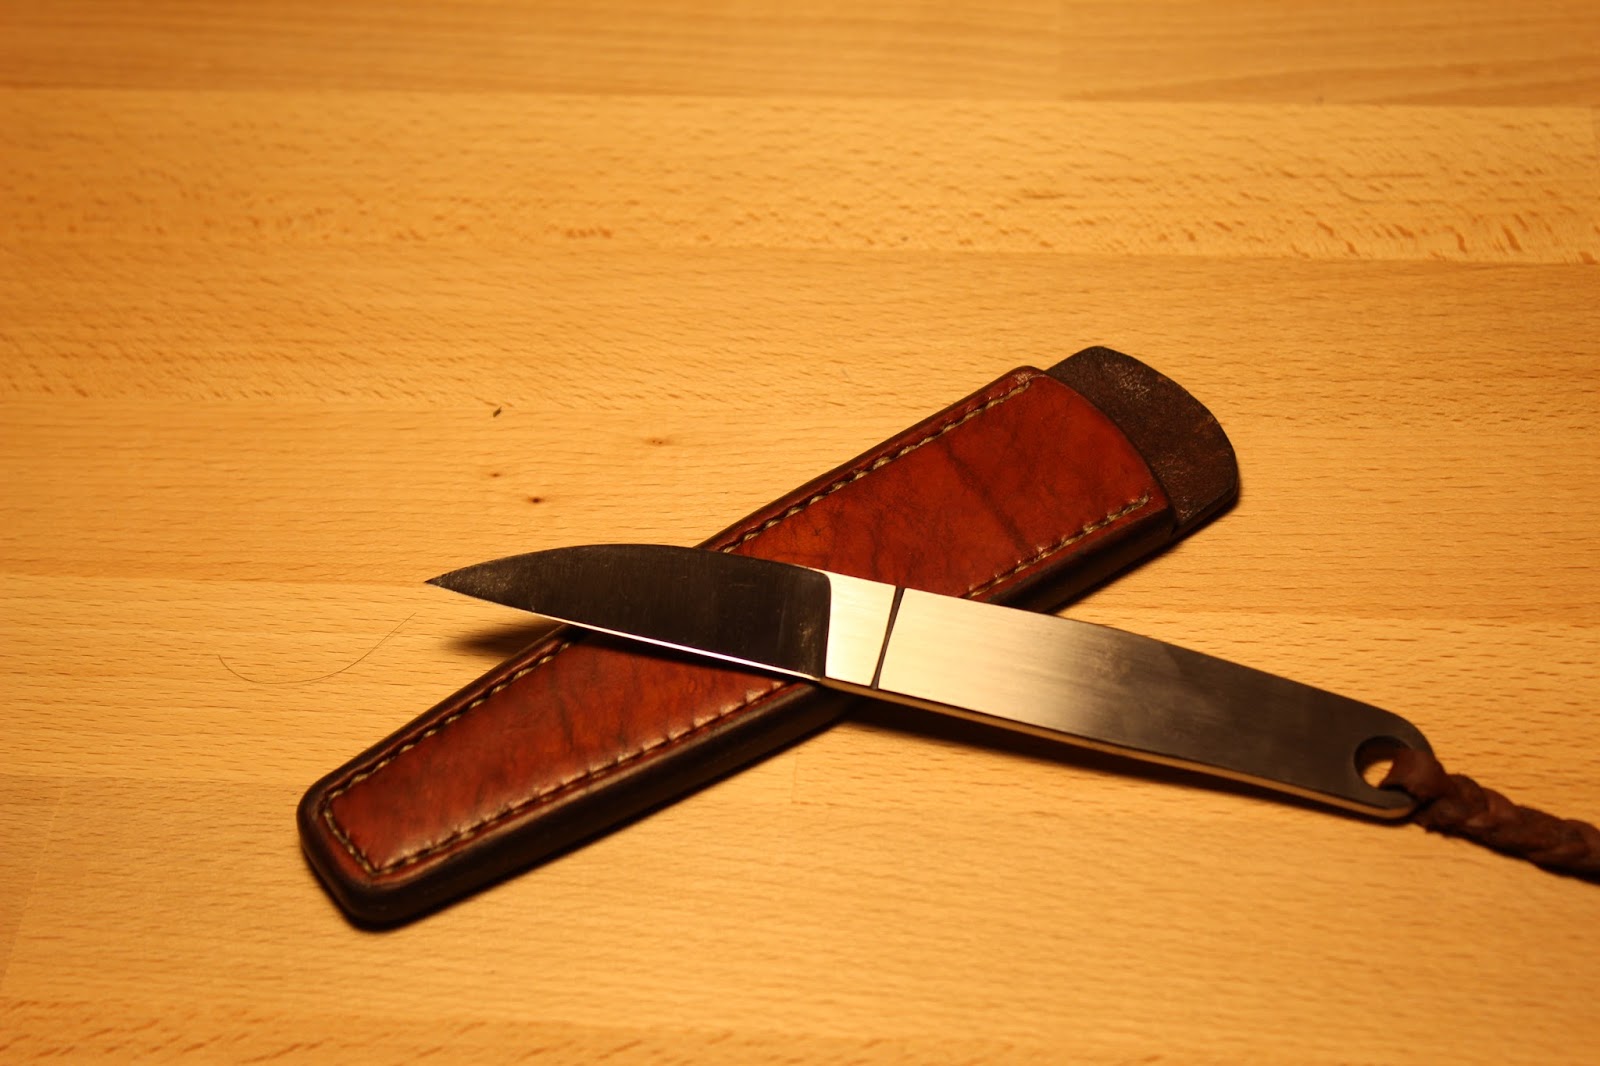
All polished up and ready for a sheath.  Perhaps copper plating might be a nice touch in the channels - I'll have to think about that one! 


Sunday, 14 December 2014

First commissioned knives (2/4)

Hey all,

Finally got around to finishing 2/4 of the knives done and delivered, and I'm glad to say that the recipients are really happy with their knives! I don't have too many pictures of the process as it's somewhat difficult to take pictures while your hands are full/ filthy. I'll need to figure something out something if I'm going to do a proper work in progress. The knives I finished were the small EDC blade in cocobolo and the denimite cheese knife, both of which I think turned out pretty well. I finished the handles to a high grit ( 2000+ for both) in order to bring out the character in the materials and finished them both with tung oil and paste wax. Both sheaths were done up in vegetable tanned leather. For spacing the stitches, I used a two pronged stitching chisel, which was a big improvement in consistency over the divider calipers that I have been using in the past, and have been using a diamond profile stitching awl to make the holes, that I found allowed for a more consistent and overall better product. The sheath for the EDC was a simple pancake style sheath. For the cheese knife, given that it had a somewhat unconventional shape to keep things compact I decided to draw from how japanese knife sayas were designed, hence the cocobolo retaining pin, which allowed for a very secure and snug fit in the sheath.


I braided some red cotton skein to tether the retention pin to the sheath so that it wouldn't get lost - not too sure if I would do that again - maybe try a different material?


Wednesday, 21 May 2014

Post-Exam Knife WIP - finally done

 Hey all,

Finally done finishing the knife I started from the holidays, not much to say  - enjoy the pics! I also completed a kydex sheath while I decide whether or not to make a leather pocket sheath. This is probably the best one I've made so far, but I'm still learning. The glue joints could be cleaner and I need to find a way from keeping the mosaic pin from cracking out small pieces, but overall ergonomics and geometry seem to be good for now.


Skipped a few too many pictures in the shaping process to the final product - hard to take pictures with the amount of dust coming from this thing


Using a heatgun to make the kydex malleable for the press


Thursday, 19 December 2013

Post exam knife making

It's been a while since I've made a post on anything, but that's what grad school does to your hobbies haha. Just spent the past two days working on some small knives. They're made from 1/8" thick x 1" wide O1 tool steel. The leaf blade is a new design that I drew up on CAD and the first one that I've done from a CAD design, and the second one is an old blade that I made two summers ago and just finished up. I heat treated them in my paint can forge and quenched them in warm veggie oil, and tempered them at 350 for 30 minutes,so I suspect the hardness is on the higher side, which would be great for edge retention.They have yet to make the handles, since I will need to clear out the garage so that I could grind micarta outdoors, given that the dust is fairly nasty stuff. Aside from that, I'll let the pictures explain themselves. More to come later. Enjoy!


 (filing in the plunge grind - using 123 blocks as file guides)


ready for hardening!