Monday, 26 October 2015

Short Thanksgiving Weekend Project (2/2): Minimalist city knife attempt #2

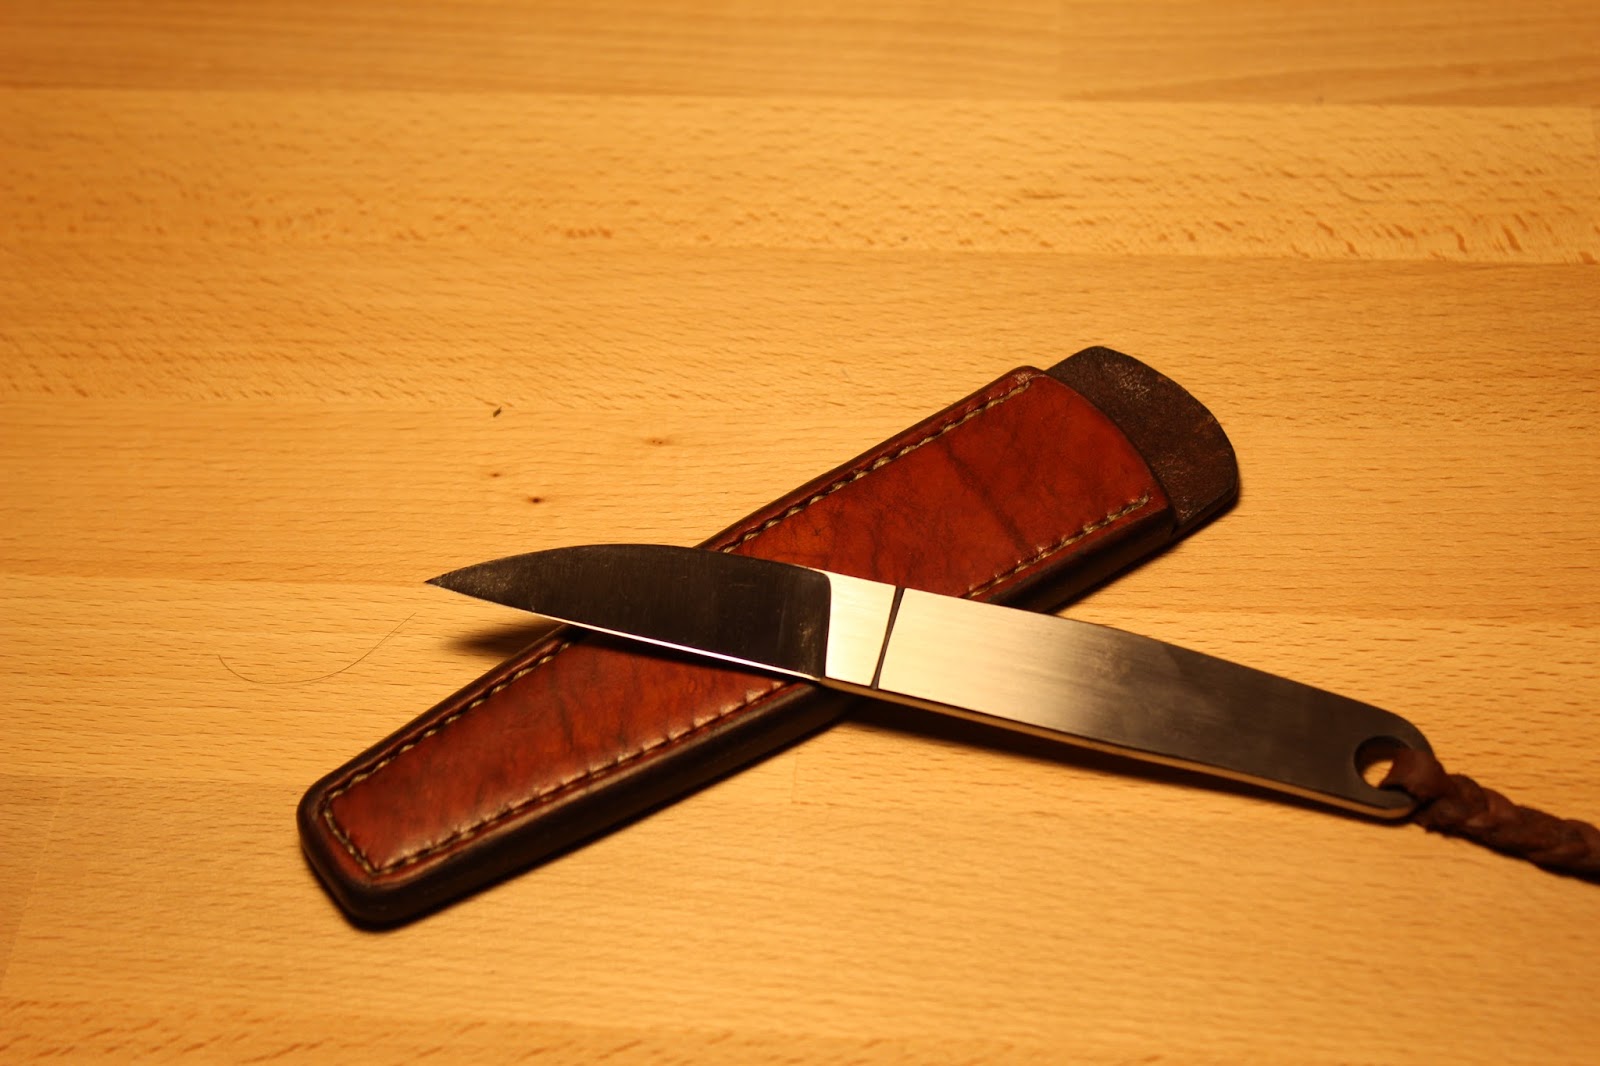
Just a short post on the sheath making process and some pics of the finished product. The sheath like the previous iteration is made from vegetable tanned leather, and was also made to accommodate the blade in more than one orientation to avoid accidental sheath damage.  I also attempted to make the welt for the knife somewhat thinner than the other city knife, since the overbuilt welt made the sheath somewhat bulky for the size of the knife. Since the welt was thinner however, I felt that it wouldn't hold up to use as long, I applied some full concentration acrylic resolene to try to toughen up the inner surface.  Thus far that treatment held up well for the axe sheath I made a few months ago, so hopefully it'll be more than enough for a simple light duty knife!

Punching the holes with a stitching chisel to set spacing for drilling with the drill press. 

Adding my makers mark to the back of the sheath. 

All the  components drilled and prepared for gluing and stitching! 
The welt was left oversize to minimize was from final edge finishing and getting all the layers flush with one another - easier to cut away than to add!

Saddle stitching - 1 out of 135 to go 

All stitched up and ready for final surface finishing - I applied both paraffin/ beeswax along with the neatsfoot oil/ resin/ wax mixture from my previous post on axe refurbishing. The saddle tan gel antique dye in the leather seems  to darken significantly after all the finishing and should be taken into account if you want something lighter! 

Burnished edge - the edges of the sheath were lightly chamfered using an edge beveller, after which chocolate brown leather dye was applied and run over with my home made dogwood burnishing tool. Nothing too special with the process there - wax it lightly or just dampen with water and rub it back and forth until it's the desired shape and the layers are well blended, then seal with the wax finishes. 

And now the glamour shots:


(probably the thinnest edge that I've put on a knife, no idea how thick it is but the width of the secondary bevel is barely visible) 


All in all I think this project was a success - and it'll serve many years peeling apples and opening letters. Overall, the slight changes to both the knife itself and the sheath are significant improvements over my last city knife in terms of both ergonomics and overall appearance, and I look forward to making more of these , maybe out of AEBL if time permits for a batch of them - hopefully not too far away in the future!  

Monday, 12 October 2015

Short Thanksgiving Weekend Project (1/2): Minimalist city knife attempt #2

Hope everyone has had a wonderful Thanksgiving!

It was a much needed break having just started a new job and moving over to another city, but I think I've just about settled in!  Unfortunately it also means that I've had much less access to my shop at my parents's place, so projects will be much more sporadic from here on out for the next while. 

This time around I tried my hand at making another city knife, but this time slightly larger and beefier so that it would fit the hand more comfortably, and I thought it would be a good way to test out the TDM from my last post. I didn't have a chance to take many pictures due to the fact that I left my good cameras back home and only had my phone, but thankfully those turned out pretty well. After looking at where I could improve on previous iteration I chose to do some. I used a hacksaw to cut the groove on the flats using a 123 block as a guide, then going in with a needle file to polish and round out the channel with sand paper for a much cleaner look. In terms of heat treatment, I also gave it a triple temper, which noticeably increased the toughness relative to my previous run. As well, I decided to get rid of the heat treat scale to give it a much cleaner look that would accept a patina over time that I think will give it alot of character.

I will get to working on the sheath when I am able get access to my shop again ( or can bring in some of my tools to the apartment). Until then enjoy the pics!

Laying out the template from CAD on a piece of 1" O1 tool steel. 

Ready for heat treatment! I'm really liking how close I can get the grinds with the new grinder without burning the steel or having to do a ton of hand sanding to fine tune the shape.

Post heat-treatment
All polished up and ready for a sheath.  Perhaps copper plating might be a nice touch in the channels - I'll have to think about that one! 


Friday, 11 September 2015

Grinder upgrade : TDM 2x72 Grinder

Hi all,

August was a fairly busy month for a number of reasons, but I have finally had a chance to get around to setting up my new grinder! While my old Craftsman 2x42 has served me well, there was only so much I could do with it, so I bit the bullet and I purchased this one some time in December of last year and it was sitting in the box since then in several pieces. This was the early bird version of the TDM 2x72 knife maker's grinder offered from Canadian Knife maker and designed by Terry Monteith of Alberta, and it has since made several upgrades to the design. You can check out his work here at Canadian Knife Maker and on his forum at 2x72 Grinders.

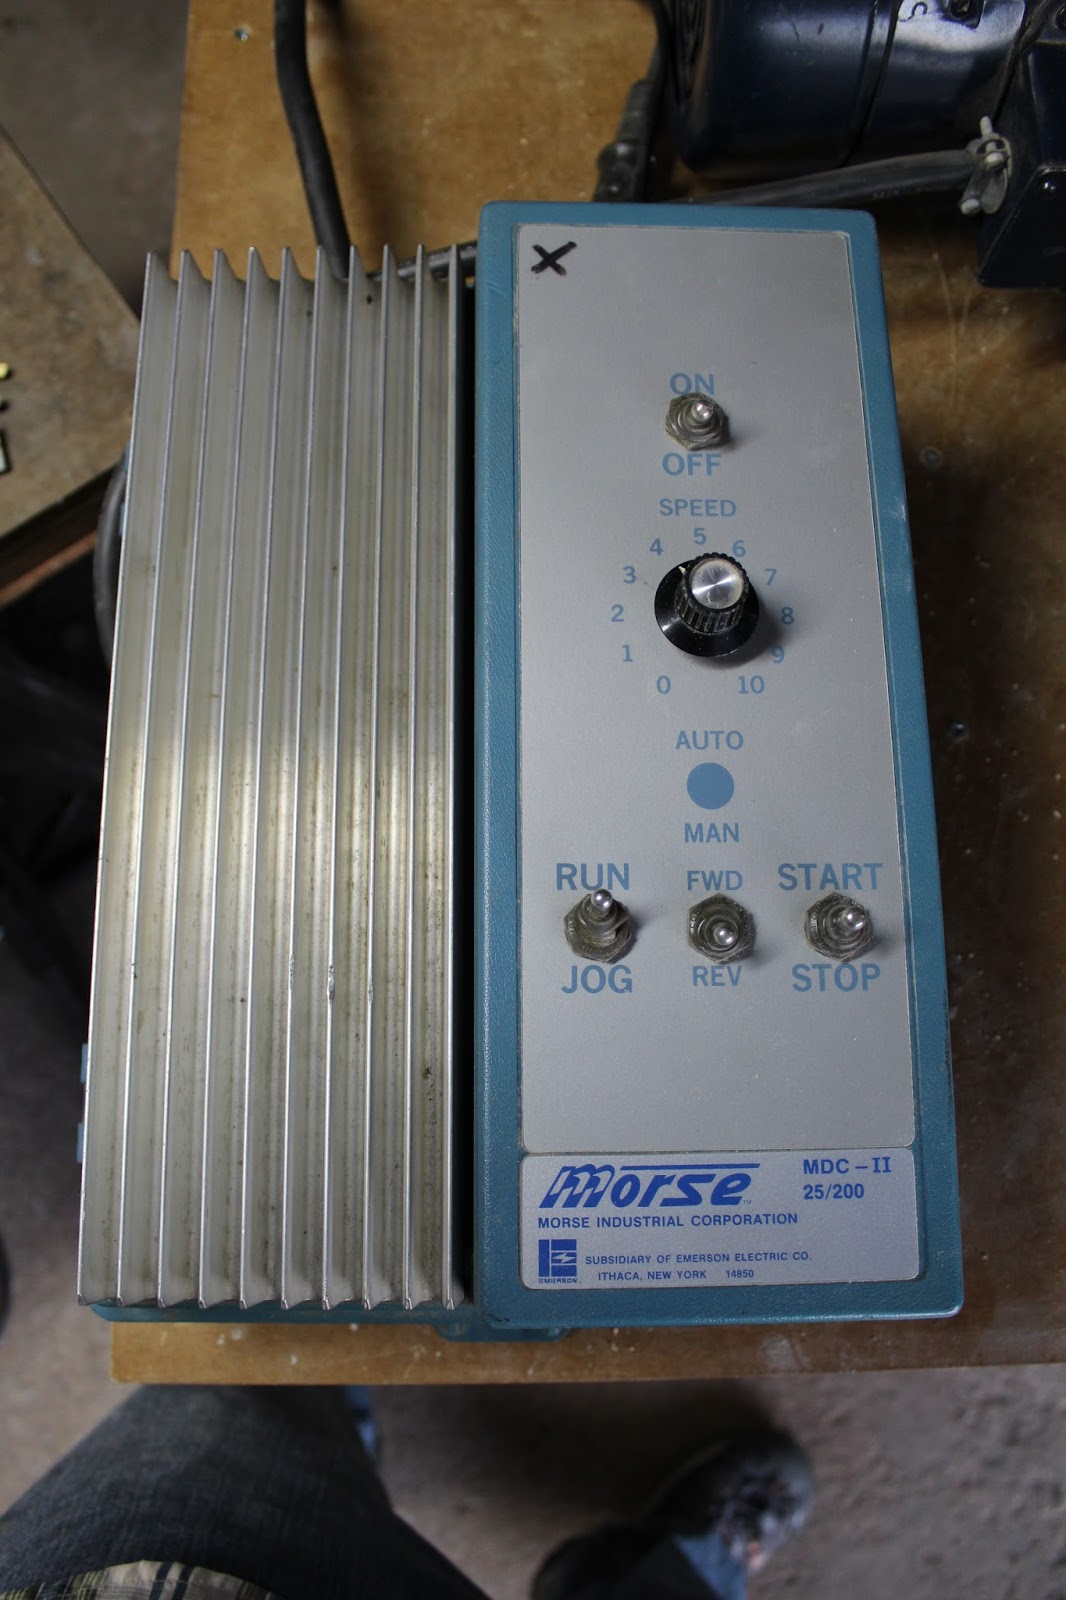
Initially I came across a few problems with tracking, where the original tracking plate was canted off to one side too far causing the belt to slide off to one side no matter how far the wheel tilted, but Terry was extremely helpful in sending me replacement parts and providing advice! I made some additional modifications to the grinder including a granite platen backing and a large adjustable work rest from aluminum plate and some 123 blocks. I also set up the grinder with a secondhand 1HP DC Leeson motor and Morse speed controller. The variable speed will greatly expand my capabilities and allow me to both hog metal as well as work with hardened steel on low speed, so I'll be looking forward to those projects in the future! I'm happy to say that the grinder is now tracking, all trued up, and ready for action. Can't wait to use it! Enjoy the pics!

The new grinder, in all its glory (the old grinder is sitting in the corner in the upper left beside the ladder).

A little on the large side, but I'm sure it'll last me for quite a while! 


The ultra smooth granite platen. (held on with double sided carpet tape and an aluminum stop to keep it from sliding off should the glue fail)

Tuesday, 21 July 2015

Axe Refurbishing WIP: Round Two

Hi all,

Haven't had as much time to work on projects as I'd like - but I did find a few breaks to get another axe restoration done! This time around it's a Walter Black Diamond. Doing a little homework I found out that these were among some of the finest axes made in  their time, and made in Canada! In it's original condition it looked like the owner knew what they were doing as far as taking care of tools went - edge geometry was well maintained , pitting was not too deep and the head didn't have a trillion nails for wedges stuck in it.

The handle also seemed ot be in fairly decent condition - I'll have to admit I felt bad for destroying something that was likely over twice my age, but I didn't want to take any chances with cracks of any decay which may have been occurring inside.
Great grain orientation - I can't imagine how long it took for all that linseed oil to build up that deep into the wood
 After some light filing on the poll to remove some minor mushrooming. I used electrolysis to remove the bulk of the rust.


Clean up and sharpening were more or less the same as the previous axe restoration on the True Temper, and it was onto the fitting. I fitted the head with a shorter house axe handle (~19") so that I would be able to take it on long hikes and have it be too bulky. For the size of the head, the handle was a bit short, but I figured it would do. The only thing different I did this time from the previous axe was in the finishing, leaving it at 220 grit and applying a 50/50 mix of  paraffin melted into paraffin for waterproofing. I find this method is certainly faster than applying X number of layers of linseed oil, since it takes very little time to polymerize and is fairly robust.

The axe sheath was also done similar to the previous, with the exception being that I used double cap rivets instead of chicago bolts on the areas subject to the most stress and saturated the welt with acrylic resolene to increase its cut resistance. The final finishing was also tweaked from the previous, which only used paraffin.


My original plan in finishing of the areas subject to movement was to use something called Obenauf's Leather preservative, but  being a Canuck in Canada, specialty items are tougher to get unfortunately.  After doing some research on the product, it appeared to be a mix of beeswax, propolis (bee derived resin), and some mix of oils.  To make the next best thing, I improvised and melted up some mink oil, wax, and cleaned spruce resin collected from the front yard to make a balm like concoction. The mink oil was to act as  lubrication for the leather fibers, resin as a preservative and waterproofing agent (hopefully), and the wax was for waterproofing and to tie it all together. So far results have been promising, providing decent waterproofing and buffing to a high shine, but only time will tell. Gotta love the forest-y smell though!

about 3 oz of cleaned spruce resin - the original volume in raw form was about four to five times as much due to a large proportion of air in the sap - do not melt this stuff indoors!! 
final leather finish product after mixing resin with wax and mink oil- it looks solid but is still very soft at room temperature, think lip balm in terms of consistency

Friday, 19 June 2015

Cottage Trip + Recent work

After one and a half years of no vacation, I finally had the chance to get some downtime and spent a week at a cottage with the family up in Haliburton on Kennisis Lake. A little buggy for the time of year, but the weather held out for the most part to give ample time for exploring by kayak and some hiking, BBQ, and of course campfires!


The axe I refurbished a finally got a good workout from some impromptu woodcarving. This was after finding out that the only spatula in the cottage was a horrible worn out plastic one that was leaving plastic bits in whatever we made. Luckily there were plenty of decent sized seasoned maple logs to choose from and I selected a log with what I thought had fairly straight grain. I split off a 3/8" board from it, and roughed out the profile using light chops with the axe, then final carving and scraping with a knife to dial in the tapers and give it a smooth finish. Overall not too bad for a first effort I think, but in hindsight I think this would have been easier with a hatchet or smaller axe, maybe that'll be my next project.


Spatula after initial shaping with the axe.

Finer shaping using a knife (made by me a few years ago). 

The finished product.


Cottaging aside, I just finished my most recent request for a fire kit, and came up with a new design for a bottle opener/ striker/ pocket chisel (if anyone has any ideas for a better name please let me know haha).  The design evolved from an earlier bottle opener design I made from an off cut, but with the addition of a chisel to allow for cutting, scraping, or light prying.  The tool is 1/8" O1 tool steel and the firesteel is black canvas micarta with a bright red double stripe.  The sheath itself is vegetable tanned leather and patterned similar to an earlier piece, but with the addition of a brass dee ring to allow for more carry options.


On another note, I am almost finished tuning and setting up my 2x72" TDM belt grinder that I got from Canadian Knife Maker.  After getting some belts, making a stand, and modifying the platen I'll be putting up pictures of the finished product.

Cheers!