Monday, 1 September 2014

Short Weekend Project: Minimalist integral city knife attempt (2/2)

Part 2!

Finally heat treated the blade to a dull cherry red and quenched it in warm vegetable oil, then tempered it immediately at 400*F for about 1 hour with good results - takes an edge beautifully without being brittle and seems to keep it well. That was an issue I was finding with the previous piece I made, where I tempered for only half an hour at 375*F , and allowed the knife to get cold prior to tempering. This seemed to result in some chippy-ness that would make the knife unsuitable for things like wood carving and also prevented the knife from being as sharp as it could have been, which may have been a function of both the edge geometry and heat treatment, still gets sharp as hell but I've seen sharper. That said it's still great for softer mediums like paper, fruits, and cardboard!

I decided  finished the knife and decided to leave the handle portion in its as heat treated state for added rust protection and just to give it a more unique look. The sheath was a bit of a first for me as I haven't made too many completely leather knife sheaths aside from the ones I've made for my kiridashi. In my first attempt I goofed up a bit and it didn't occur to me that I should punch the holes through the leather before bevelling for burnishing the edges and had to start over :( .

 Attempt number 2 went more smoothly, as I took no chances and drew up a template on CAD and was more careful in the steps I did things.  I also decided to add a little feature to make use more simplistic - usually with these sheaths the knife can only go in one way ( as far as I know) as the welt is shaped to the knife for only one configuration. That would be fine and dandy the sheath was a fold over over kind ( the ones made from a single piece wrapped around the knife) , but I found that with a symmetrical one people tended to forget - especially at first, which way the knife went in, resulting in excessive wear and tear on the leather. My solution was to just make the welt work for 2 configurations as you can see in the pics below - so that the blade can go in both ways but still be snug without wiggling about. Anyhow, on with the pictures!



Sunday, 24 August 2014

Short Weekend Project: Minimalist integral city knife attempt (1/2)

Finally have some time to breath now that I'm mostly done school. Decided to keep this project simple for the weekend. As the title says, I was attempting to make a Rob Loveless style city knife, but decided to go the minimalist route a la Mike Lovett and go without scales on this one and round out the handle section instead. Again, this one was made using O1 tool steel , but I had to improvise on the grind a bit since it was 1/8" and I needed something on the order of 1/16" and ground past the spine so that it would be thin enough to be a good cutter ( if I recall it was called a rebate grind but don't quote me on that). Unfortunately I couldn't finish it today as I found out that we had run out of propane, so no heat treatment yet, but hopefully next week I can heat treat it, play around with the finish a bit and make a leather sheath with plenty of pics!

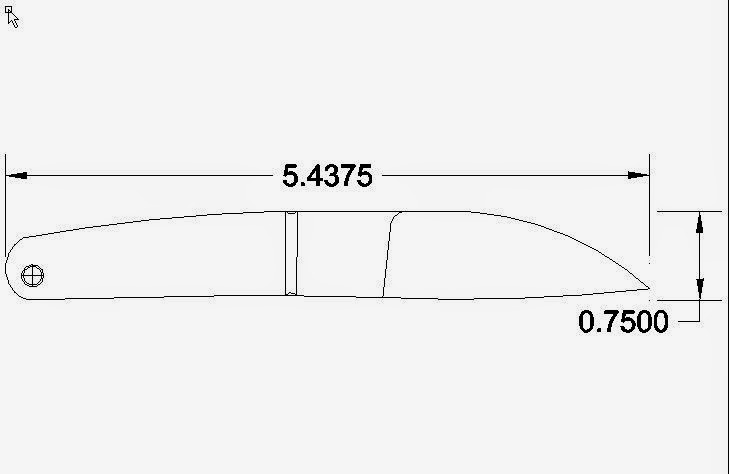
My CAD mockup - this is probably the smallest knife I've made. 


Closeup of the rebate grind - thinned down the original stock by approximately half.

Wednesday, 21 May 2014

Post-Exam Knife WIP - finally done

 Hey all,

Finally done finishing the knife I started from the holidays, not much to say  - enjoy the pics! I also completed a kydex sheath while I decide whether or not to make a leather pocket sheath. This is probably the best one I've made so far, but I'm still learning. The glue joints could be cleaner and I need to find a way from keeping the mosaic pin from cracking out small pieces, but overall ergonomics and geometry seem to be good for now.


Skipped a few too many pictures in the shaping process to the final product - hard to take pictures with the amount of dust coming from this thing


Using a heatgun to make the kydex malleable for the press


Monday, 17 February 2014

Long overdue axe sheath + knife update

Hi all,

Not much to say here aside from I've finally gotten around to making the sheath for the True Temper axe that I rehung several months ago. I designed the template on CAD, and made it from vegetable tanned leather and waxed it with paraffin for added durability and water resistance,but I almost ended up "cooking" the leather by accident by letting the heat gun sit too long on one spot - this the part near the edge looks kinda lumpy, but not beyond repair I hope. Otherwise I think this project was a success for the most part. The two Chicago bolts on each end of the stitching are for added durability and to keep the sheath from coming undone at those parts. For some reason the rubber cement wouldn't hold near the edges of the welt, if anyone knows how to remedy this please let me know!

Enjoy!


*Updated pics - added an extra row of saddle stitching and another button snap for extra security. 


P.S.

As for the knife that I started last year during the holidays, the materials arrived a while back and the handles are ready for shaping. For this one I'm using olive green canvas micarta with black and brick red liners fastened with West Systems epoxy and corby rivets. Unfortunately that will have to wait for a while since micarta gives off formaldehyde when cut or worked (which I learned the hard way). So I will have to get a better facemask/cartridges and wait for the weather to improve so I can work outside to avoid stinking up my work station / the rest of the house.


(DON'T DO THIS INDOORS!!)


Thursday, 19 December 2013

Post exam knife making

It's been a while since I've made a post on anything, but that's what grad school does to your hobbies haha. Just spent the past two days working on some small knives. They're made from 1/8" thick x 1" wide O1 tool steel. The leaf blade is a new design that I drew up on CAD and the first one that I've done from a CAD design, and the second one is an old blade that I made two summers ago and just finished up. I heat treated them in my paint can forge and quenched them in warm veggie oil, and tempered them at 350 for 30 minutes,so I suspect the hardness is on the higher side, which would be great for edge retention.They have yet to make the handles, since I will need to clear out the garage so that I could grind micarta outdoors, given that the dust is fairly nasty stuff. Aside from that, I'll let the pictures explain themselves. More to come later. Enjoy!


 (filing in the plunge grind - using 123 blocks as file guides)


ready for hardening!