Hi all,
It's been a bit of a gap due to waiting for some handle materials to come in the mail, but I'm happy to say that I've been able to get back to work on them!
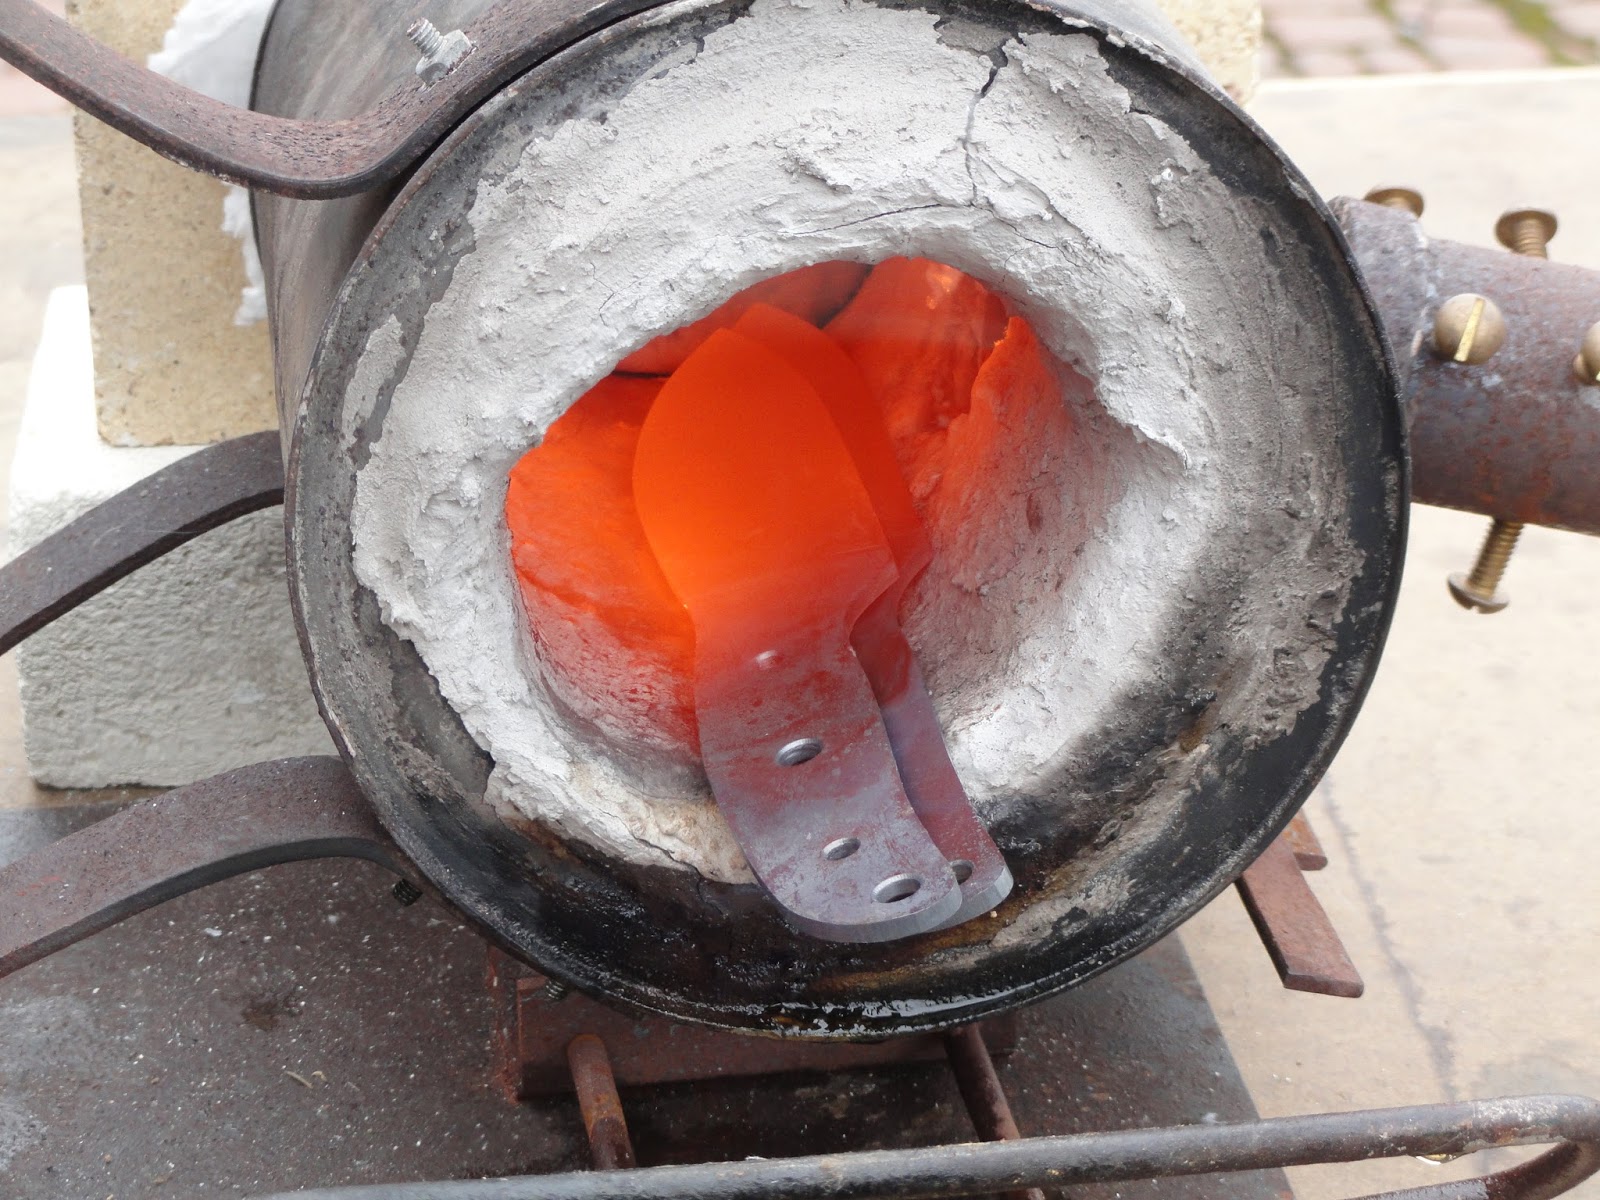
I heat treated the blades after normalizing them three times at critical temperature ( dull cherry red, or about 1500 degrees F~ as close as I could judge by eye), soaking them at temperature for 10 minutes per cycle before finally quenched them in warm vegetable oil in the last cycle. The warming is critical to prevent a vapor jacket from inhibiting hardening and maximize the transfer of heat from the steel to the oil. They were then immediately tempered in a toaster oven for 2 hours at 400 degrees and allowed to cool to room temperature.

 |
| Normalizing on kaowool ( the second puuko from the right has a slightly shorter bevel from the other one - I accidentally set up my guide too far forward on the blade but it's an easy fix) |
 |
| Quenching in vegetable oil |
 |
Post tempering shot - still coated in scale.
|
 |
| Descaling in citric acid bath |
While fixing some minor warping in the knives that happened during heat treatment, one of the Canadian belt knives to my horror had snapped in half at the junction between the blade and handle after some minor bending in the vise. This was initially quite shocking as I thought I had done everything right with the heat treat with what equipment I had, but it just goes to show that you can always learn something new. Having a closer look at grain showed that it was extremely fine where it had broke, so taking the knives back to the forge wasn't necessary.
 |
| A chunk of the broken blade - I would say that's fine grained if I ever saw it and ideal, just too brittle though. |
Back tracking, I figured that it would be worth testing if the tempering was too low to take the brittleness out of the steel. I put the knives and broken blade back in for a second tempering cycle for another two hours at 450 degrees to see what difference it would make and do some impromptu destructive testing to decide if the batch was a write off.
Following tempering, it was back to the vise, and thankfully the higher temperature was a success! I wasn't able to break the broken half of the blade using the three point method in the vise ( two pieces of wood on one jaw vise and one on the opposite jaw between the two oppose pieces). This resulted in the blade flexing to about 45 degrees from true after closing the vise as far as the wood blocks would allow and springing back to a slight bend that was easily corrected by bending in the opposite direction.
 |
| Success! This was after the vise had maxed out on tightening and the blade popped out along with the wooden blocks I was using, you can see how much they indented the wood jaws. |
Full disclosure, I didn't take any pictures during destructive testing for fear of the blade snapping catastrophically or popping out of the vise and destroying my camera - which was thankfully a good idea since the latter did happened and took out a chunk of my wooden vise jaws with it. To get a failure I had to take the blade to my steel jawed vise and bend them to about 80 - 90 degrees from true - with plenty of bending before it snapped. This is by no means a go ahead to use the knives as a pry-bar, but they will be plenty tough for normal cutting use. I am by no means an engineer, but I would think that this is a good result and will be using this heat treatment regime from here on out! I'll be making a replacement for the Canadian that was destroyed in this batch in my next round of knives.
After receiving my handle materials in the mail ( liners and stainless thong tubes) , I went to work on the handle scales from African blackwood, chatke viga, osage orange, as well as natural and black canvas micarta in combination with black paper micarta and vulcanized fiber. There wasn't too much different that I did from the previous batch of knives aside from using a downdraft table this time around to keep dust to a minimum while getting them square and even thickness. One of these days I'll invest in a proper bandsaw to save time and headache when re-sawing wood, but until then it'll be the old school method with a jack plane, sandpaper on a marble tile, and Japanese ryoba saw. Again, not too many pictures of the action since I only have two hands.
 |
| Osage orange (top) and chatke via scales (bottom). Both woods are known to be extremely durable and have been used as fence posts where they are native, with reports of them lasting up to 100 years in soil. While not at the level of rosewood, they also have a fairly high Janka hardness so they won't get banged up or dented too easily. For reference, maple has a Janka hardness rating of about 1400, while these woods have a rating of approximately 2300 ). Not pictured were African blackwood scales, which is one of the hardest wood species in the world -it was a bear to saw but I have a strong feeling they will finish beautifully. |
 |
| Keying the surface of liner materials for epoxy, in this case black paper micarta. A tungsten carbide file is a great substitute for low grit sandpaper and I feel it does a better job at roughing up a surface. It was also lasts MUCH longer and the handle helps reduce strain on the fingers and hands. |
At this point in time they're all epoxied up and will be ready for processing the next time I work on them - stay tuned!
 |
| All clamped up, and now we wait! |